e‑Forms allow you to create custom forms in e‑Schooling to collect information from different users, such as students, teachers, staff members, or guardians.
1. Access the e‑Forms Module
In the main menu, go to:
e‑Forms → e‑Forms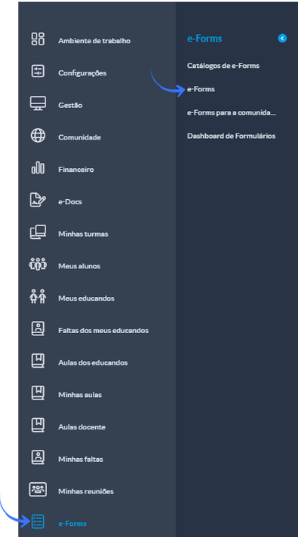
A list of existing forms will be displayed.
2. Create a New e‑Form
In the top‑right corner of the list, click the “+” (Add) button

The “Add custom fields” window will be displayed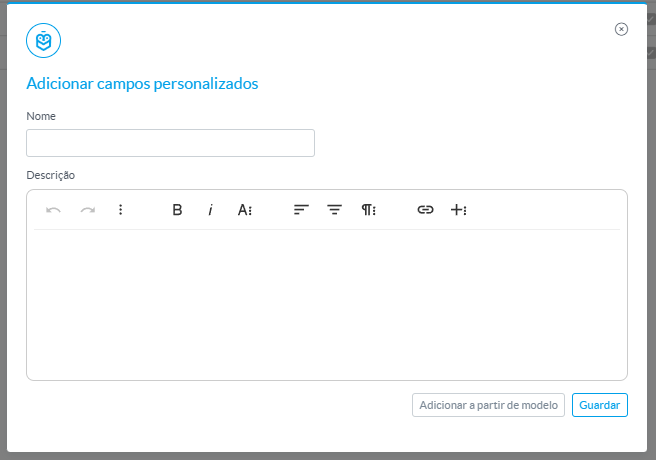
Fill in the form details:
- Name
- Description (optional)
Click Save to create the e‑Form.
Nota: Pode também utilizar a opção “Adicionar a partir de modelo”, caso pretenda basear o formulário num modelo existente.3. Explore the e‑Form Structure
After entering the name and description, the e‑Form configuration menu will be displayed, with several options available in the side panel.
The main areas are:
- Dashboard
Allows you to view an overall summary of the form.
- Settings
Where e‑Form behaviours can be defined (e.g., status, availability, among others).
- Form fields
Area where the fields that make up the form are created and configured.
- Form associations
Allows you to define who the e‑Form will be available to (users, classes, or groups).
- Form responses
Section where submitted responses can be viewed.
- Managers
Allows you to define which users have management permissions over the e‑Form.
4. e‑Form Settings
To edit the e‑Form settings, click the “…” located in the top‑right corner of the section and select Read/Edit Mode.
In the “Settings” area, you can define the main behaviours of the e‑Form, including its availability, response type, and usage rules.
Form identification
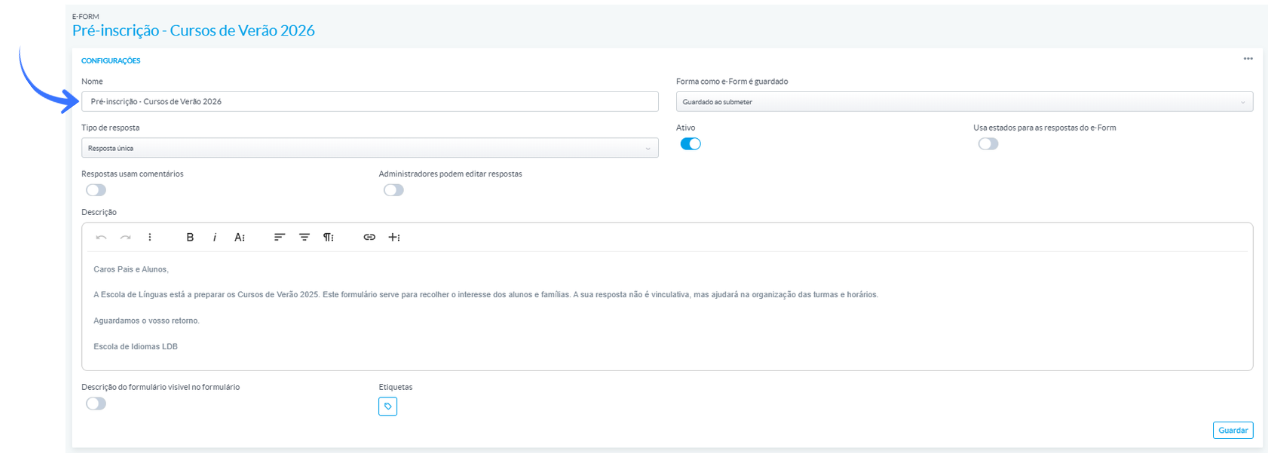
- Name
Defines the e‑Form name used for identification in the list
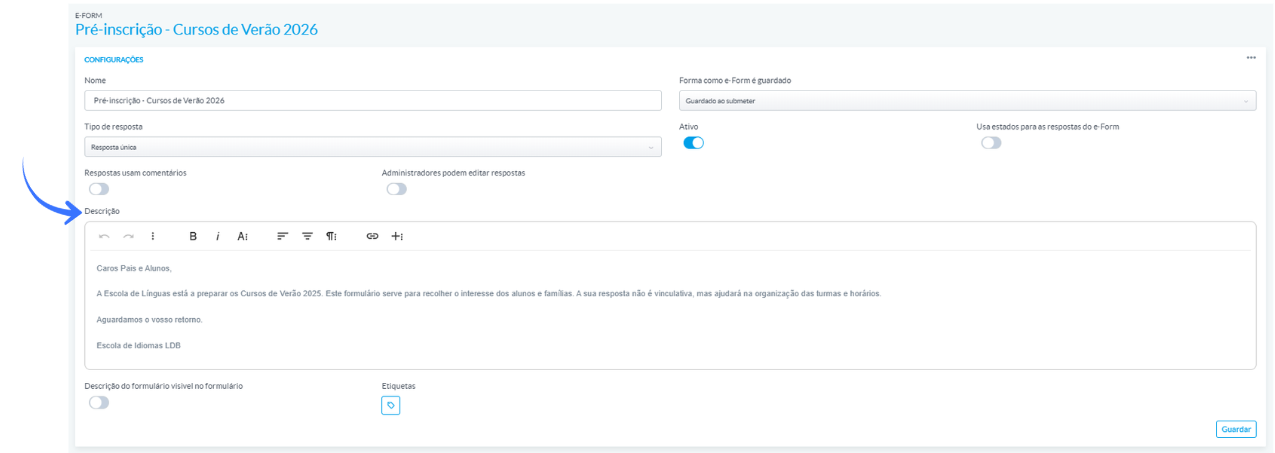
- Description
Allows you to add explanatory text about the purpose of the form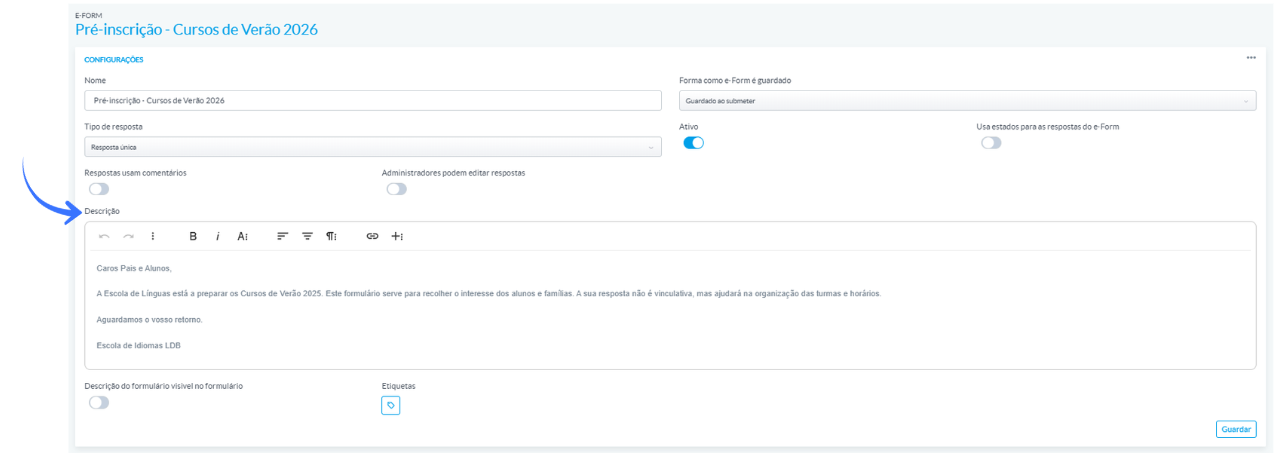
- Form description visible in the form
Indicates whether the description will be displayed to users when responding
Response configuration
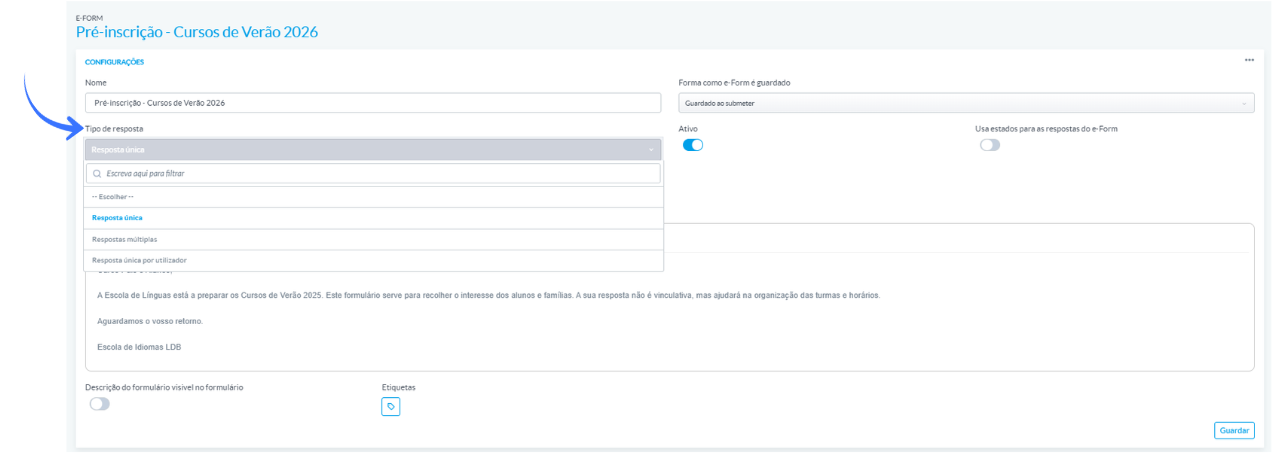
- Response type
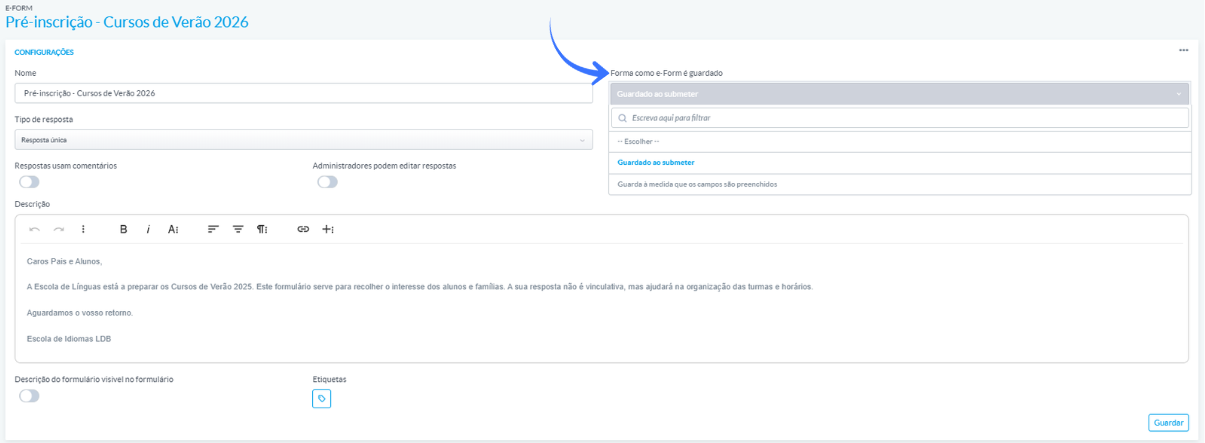
- How the e‑Form is saved
Determines when responses are recorded (e.g., upon submission)
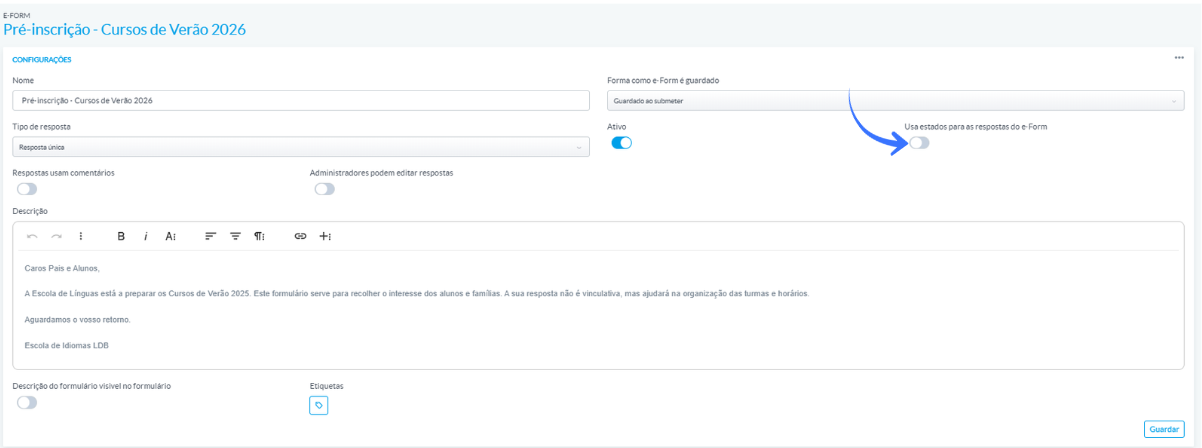
- Uses statuses for e‑Form responses
Allows statuses to be enabled in responses (e.g., pending, validated), making tracking easier
Permissions and response editing
- Responses use comments
Allows comments to be added to submitted responses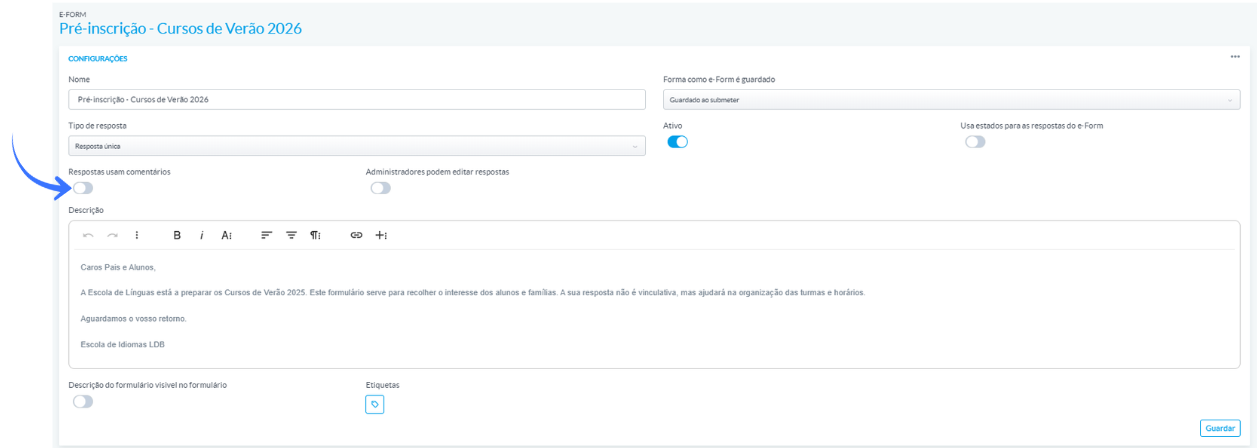
- Administrators can edit responses
Defines whether users with administrative permissions can modify submitted responses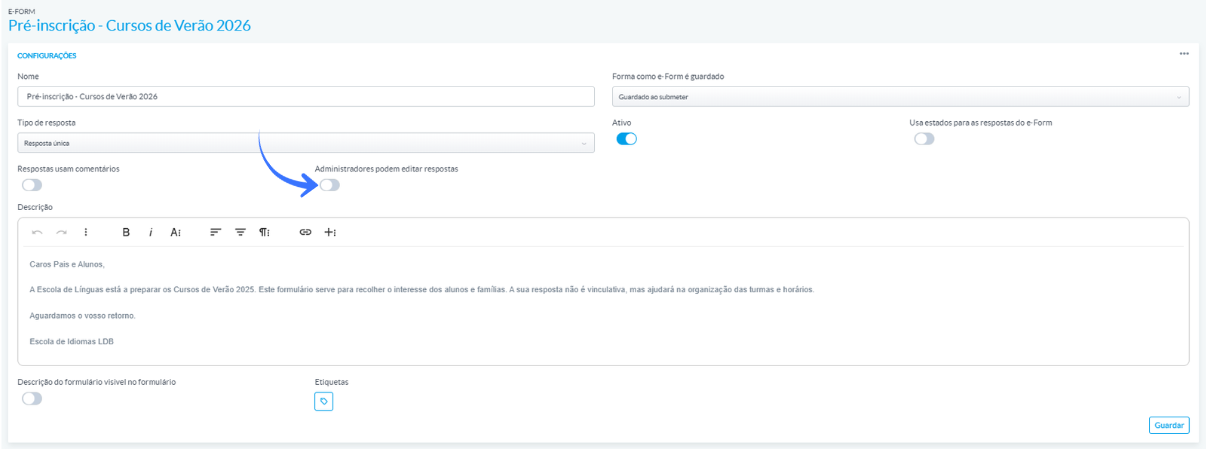
Form availability
Active
Controls whether the e‑Form is available for responses:
- Active → the form can be answered

- Inactive → the form is no longer accessible

Organization
- Tags
Allow categorisation of the e‑Form, making it easier to organise and search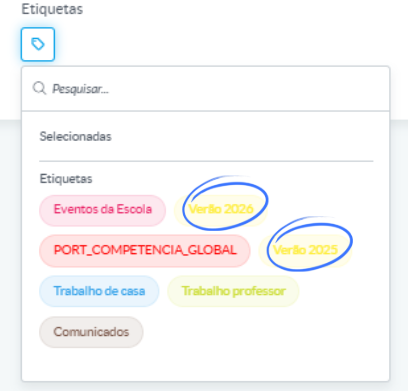
The settings defined in this area directly influence how the e‑Form is made available and used by users5. Form Associations
At this stage, you must define who the e‑Form will be available to that is, which users can respond to the form.
- Click Add

- In the “Association type” field, select the desired option:
Public link → accessible to any user with the link
e‑Forms for the community → available to all users with access
Entities → allows selecting specific recipients
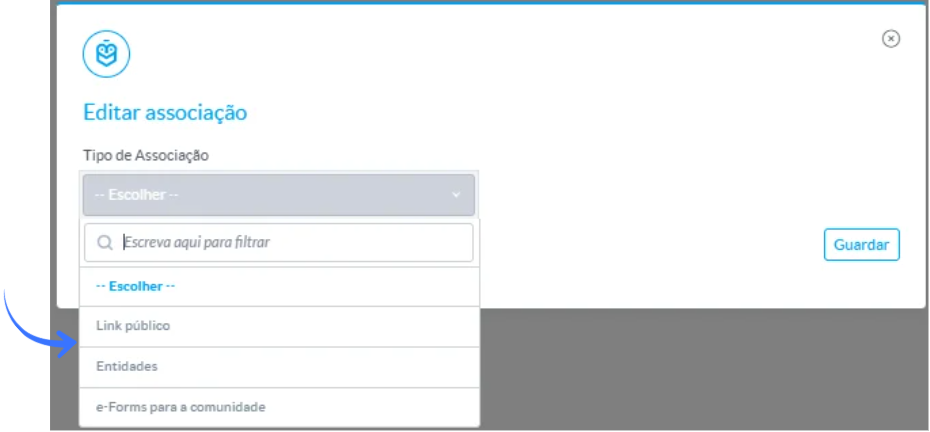
Note: When selecting the Entities option, a list of users organised by categories will be displayed, allowing you to search and select the e‑Form recipients.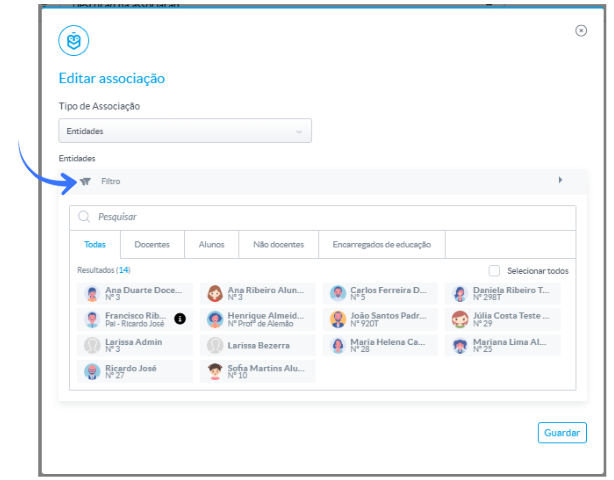
- Click Save
6. Form Responses and Managers
After configuring the e‑Form, defining the form fields, and making it available, you can monitor submitted responses and define who can manage the form.
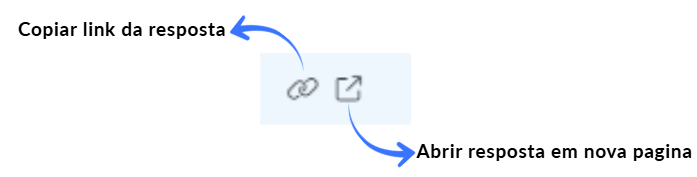
In the Form responses section, you can:
- View responses submitted by users

- View the details of each response
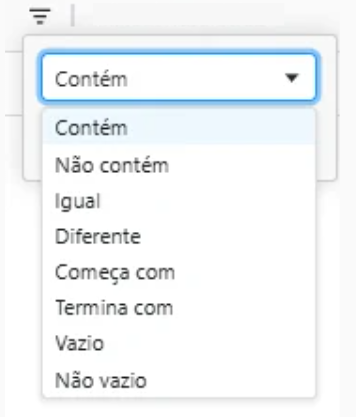
- Filter results based on different criteria
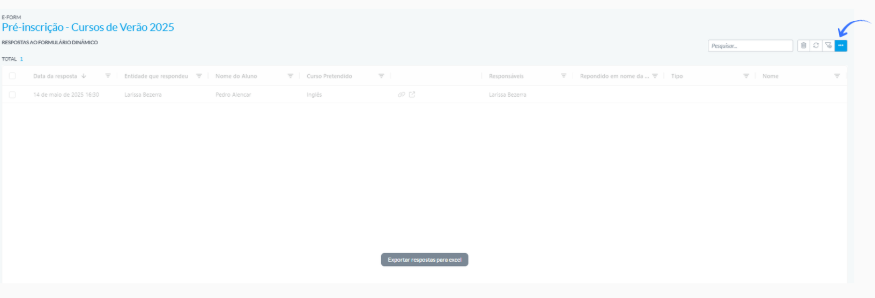
- Export responses to Excel
- Delete responses, when necessary

In the response view, it is possible to define the column display order, allowing you to highlight the most relevant information (e.g., Student name) in the first positions.
Was this article helpful?
That’s Great!
Thank you for your feedback
Sorry! We couldn't be helpful
Thank you for your feedback
Feedback sent
We appreciate your effort and will try to fix the article